

The Sense APP offers you various ways to edit your music library. In this article, we will focus on the ability to change your album covers, the album metadata, and editing the track metadata.
You can read separately how to edit the details for Artists saved in your library: Editing Artists
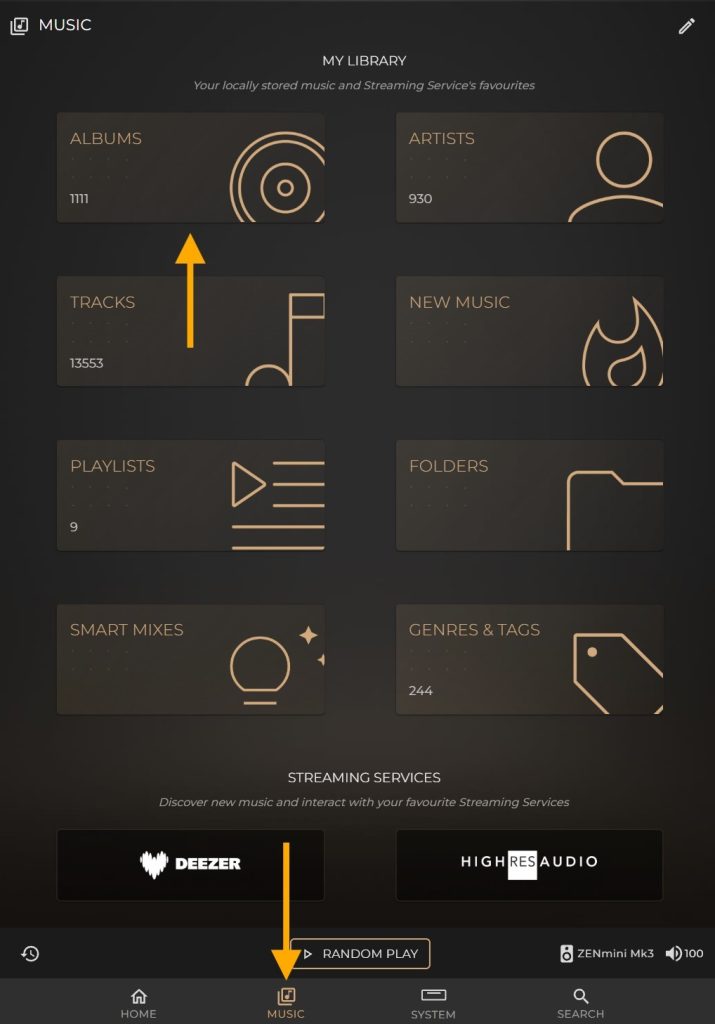
1. Navigate to the Albums section in Sense. You can do this by selecting the Music tab on the Sense dashboard, which you can access through my.innuos.com or through the Sense app.
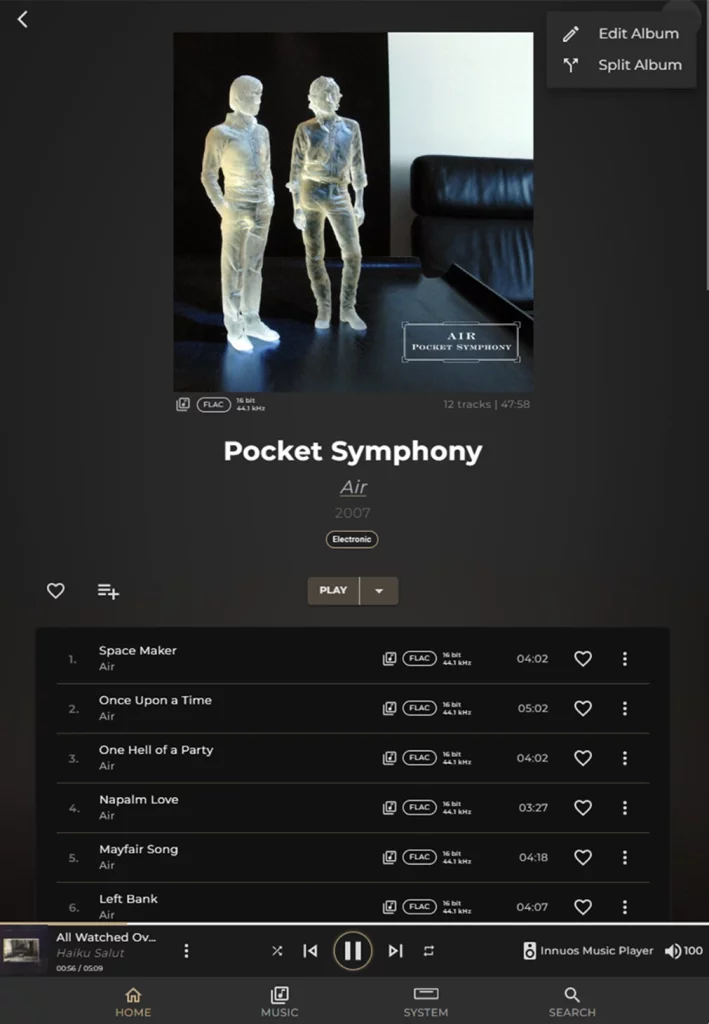
2. Select the album you want to edit, then in the top right corner of the page select the three dot icon and choose Edit Album. You will then be taken into the editing suite for that album.
Changing the Album Cover
Artists may change the covers of their record, or something may have gone awry with your album upload, or you just want a different art to display on that particular album that you like, not a problem. This option will allow you to choose your Album Cover to one of your choosing.
Select the Change Cover option in the center, right below the album cover.

Once you have clicked on the CHANGE COVER you will not notice that you have 4 options to you edit your album art cover
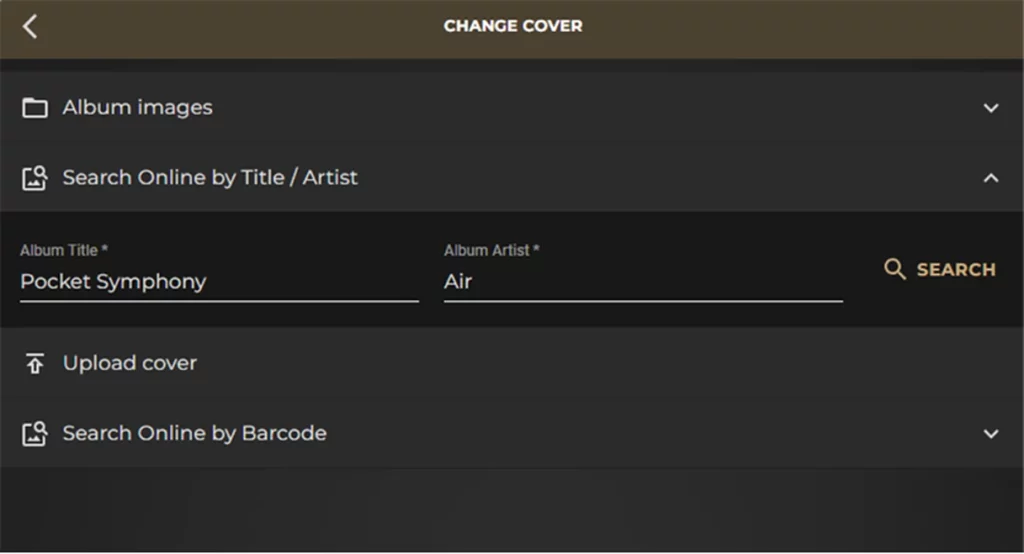
- Album Images
This allows you to switch artwork based on the images available in the Albums folder. You can manually copy images into this folder by locating it through your system shared folders as described in the guide – Accessing the Shared Folders on your Innuos System
- Search online by Title /Artist
Allowing you to search the web via the information in Album Title and Album Artist
- Search Online by Barcode
CDs have a barcode with a number on them. Just insert it here and click search
- Upload Cover
Will open up a window to your computer so you can upload a photo from it, so if you have previously saved a great cover to replace the current one, just navigate through your folders and upload it.
Editing the Album Metadata Header
These options will allow you to edit your Album Title, Album Artist, the Year of the album, if it’s a Compilation album, and also to add TAGs (Genres) to your Album
(changes will reflect on the tracks of the Album)
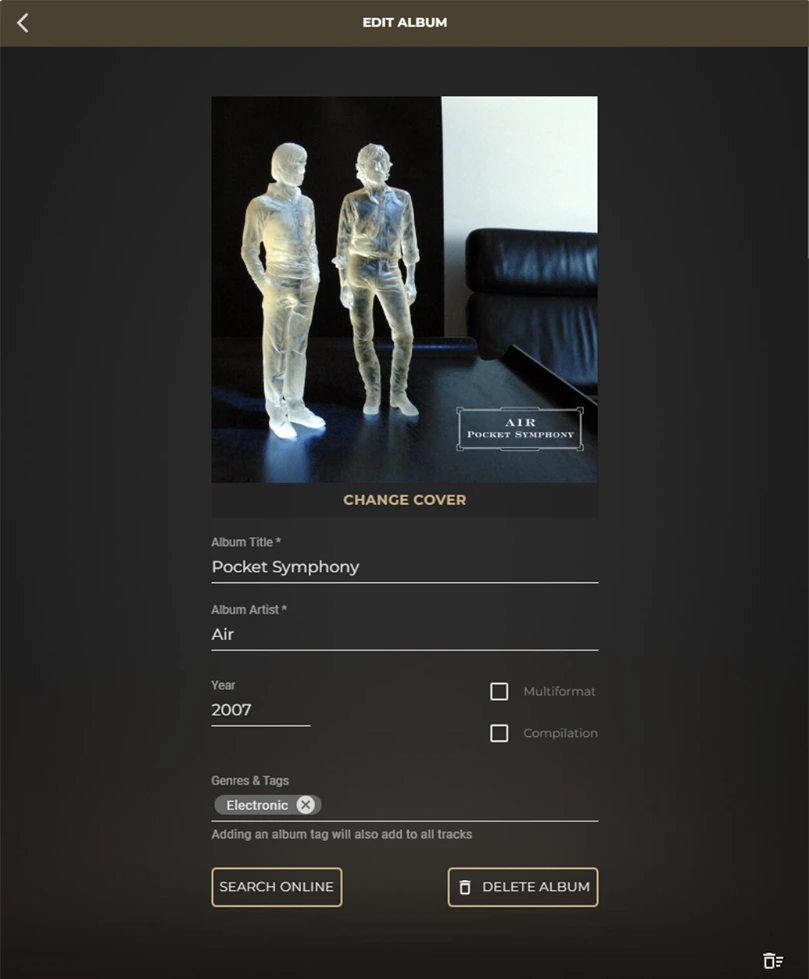
Album Title
Here you can change the album name, this is especially helpful if you are perhaps trying to amalgamate two albums into one or even if you are just trying to change some unwanted extra details from the album title such as all caps, etc
Album Artist
You can change the Artist to one more relevant. Notice that when you start typing the name of the Artist, Sense will offer you some suggestions of what the artist is based on existing artists saved on your system to streamline the process.
Year
Self-explanatory; you can here put down the 4 digit year of your album, in case the imported metadata was wrong or missing
Compilation
Since the launch of our Sense 2.0 system, for locally stored Albums, you are able to compile multiple Albums into one single Album (that could have been split up into several during the import or ripping process). This is a case where the metadata, in the original file, such as having different Album Artists’ names, is translating into splitting that album into several separate albums. This can be easily remedied by utilizing the Compilation option, and note that in the Album Artist section you will reflect Various Artists (this too can be edited)
Tags
This is where you can add numerous Tags to your album to manage your library to your liking when classifying your music. For example, this album is a JAZZ album, but it is also the Movie Soundtrack to the show CowboyBebop, so I can add a second or third TAG reflecting this information. Think of TAGS as virtual storage bins, to keep similar items together. Oftentimes, owners use tags to keep albums genres, types, and even formats together
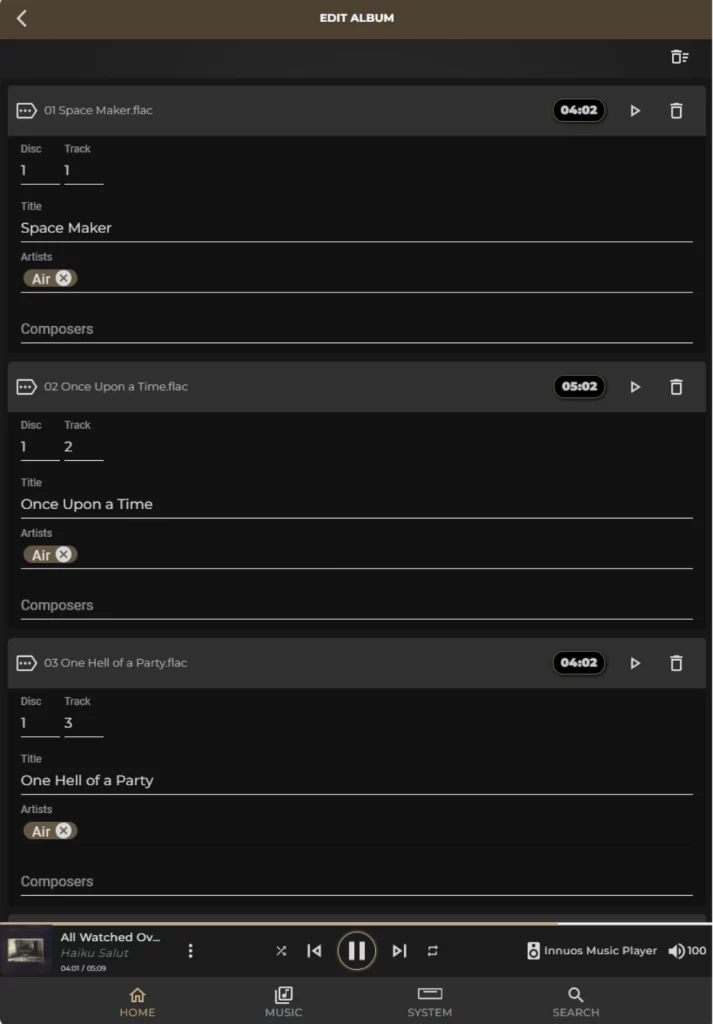
Editing Track Metadata
Once you select the album you want to change the Track information, just click on the PENCIL Icon
Here you will be able to edit individually your Disk and Track number, Title, Artist, and Composer.
(Note that here you also have the option to delete a single track with the Trash icon to the right)
Deleting Entire Albums or Single Tracks
An entire album can easily be removed from your library
Once in the album you want to delete, click on the TRASH (Bin) Icon on the lower right side and confirm it
You can also delete selected tracks individually from the album
Once in the album, click on the PENCIL icon to the lower right and use the TRASH (Bin) icon to the right of the song
If you have any questions please reach our Support team via our website or by using the Sense built-in contact form at the Sense dashboard: > SERVER > SETTINGS > HELP > Contact Support with details of the issue, including what devices, system, software versions, and how your system is connected. Thank you.