

Standard audio CDs (CDDA) remain a widely used and easily available format for digital music. All Innuos server and streamers with internal storage can rip (extract) audio tracks from compliant CDs and store them as FLAC or WAV files. Both formats are lossless, meaning they preserve the original sound quality of the CD, and are stored on the internal storage.
Our systems are not built to work like traditional CD players, so discs cannot be played directly. Instead, CDs need to be ripped first. This approach reduces noise and interference during playback and supports the role of the server as a central music library, streaming either to your networked Hi-Fi system or directly to a connected DAC.
You can choose to rip your entire CD collection one disc at a time, or just rip new CDs as you buy them. Once ripped, albums are automatically added to your Music Library and are ready to play straight away. The Sense system will also fetch album details such as title, artist, release year, track list and cover artwork from online databases, and apply them to your library.
CD Ripping on STREAM 1/3 & ZEN/ZENith Next Gen Systems
If you’re using a STREAM 1/3 or a ZEN/ZENith Next-Gen, you can follow the steps below
Adding a USB Optical Drive:
1. Access your Innuos dashboard via my.innuos.com or through the Sense app on your mobile device.
2. Connect your USB Optical Drive to a spare USB port on your Innuos server.
3. Go to Sense > System > Disc Ripper.
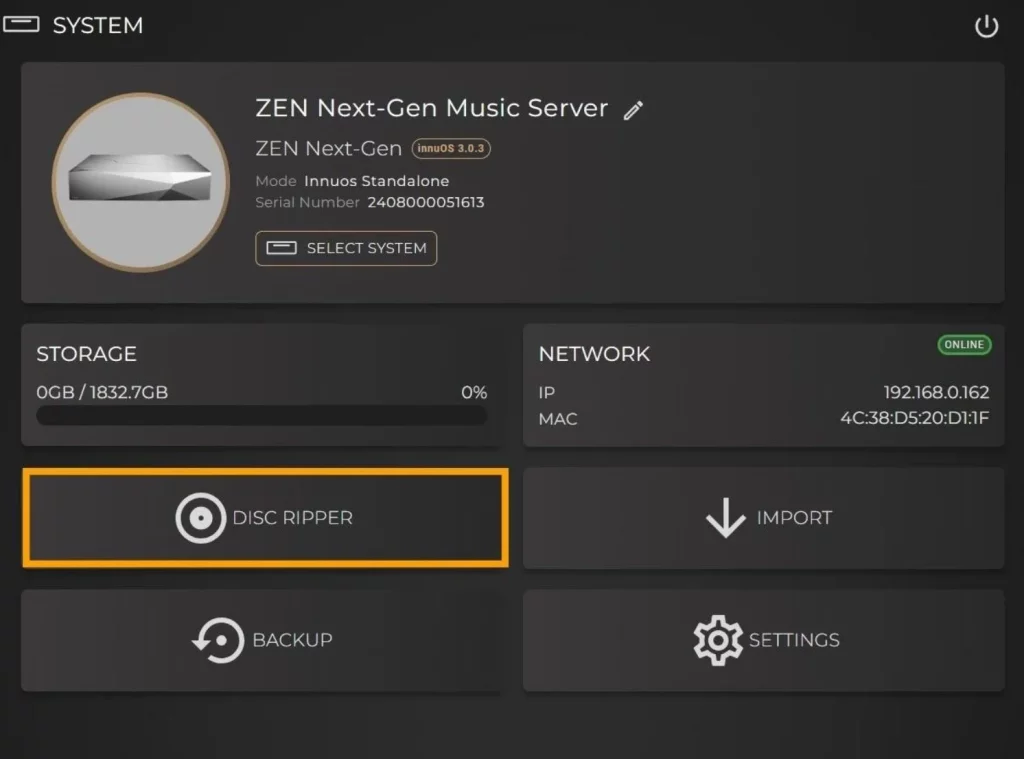
This will bring you to the main Disc Ripper page which will be temporarily set to Assisted Mode so that you can set up setup the optical drive.
4. You will now need to make an initial configuration before you begin ripping CDs. Follow the supplied link to accuraterip.com and search for the model number of your USB optical drive to check its Correction Offset value.
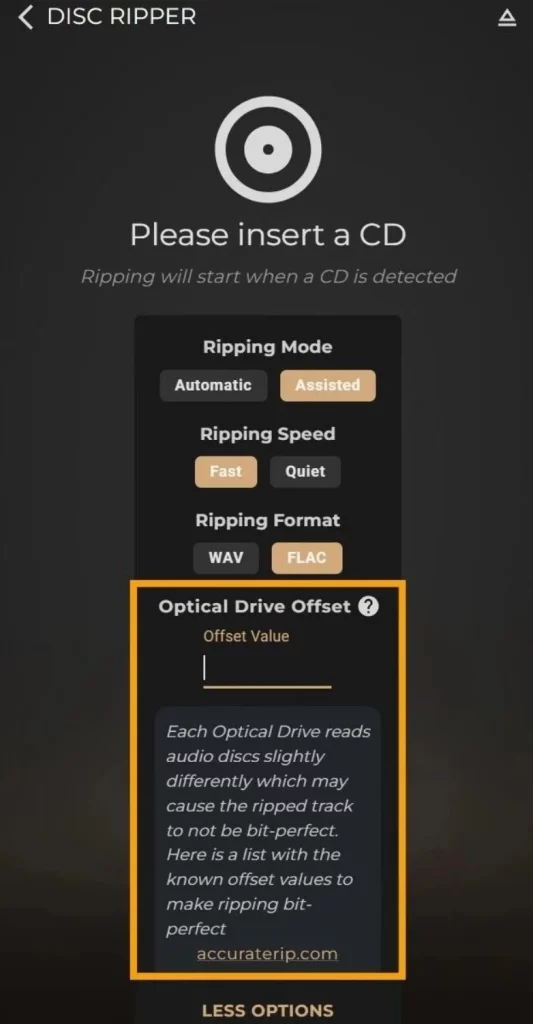
5. Once you have confirmed this value, return to the Disc Ripper page in Sense and enter the Offset Value into to the text field. This is required to help ensure a bit-perfect rip.
6. With the Offset Value entered, you may begin to insert CDs and rip them and can also set the Ripping Speed and Format if you wish. You can also switch the ripping mode back to Automatic if it is preferred.
CD Ripping Settings
Ripping Mode – Here you can choose between Automatic and Assisted ripping modes. Automatic mode will be the preferred setting for most users, as this will simply begin immediately ripping a CD when inserted and automatically retrieve the online metadata for the album.
Assisted mode will instead retrieve the metadata but will not begin ripping until given manual approval and confirmation by the user. This is so that you can take time to inspect the suggested data before ripping, allowing you the change to go into editing mode and making any adjustments you feel may be necessary such as artwork, artist name, album title and so on. This can be a useful tool for when there is wide variation in metadata options, especially for classical CDs.
Ripping Speed – Here you can choose between Fast and Quiet. The default option will be fast for the quickest rip possible, however you can choose to apply Quiet mode if you are listening to your system at the same time as ripping and want less distracting noise coming from the optical mechanism. This slows the laser down and will take longer to rip the CD.
There is no audio quality difference between Fast and Quiet modes.
Ripping Format – You can choose between FLAC and WAV file formats when ripping CDs. All the available track metadata can be applied to both file types. If ripping with FLAC, Sense uses zero-level compression so that there is a minimum amount of work for the CPU to perform during the decompression process, helping keep system noise to an absolute minimum to the benefit of sound quality during playback.