It’s a simple process to import your existing music stored on your PC or MAC.
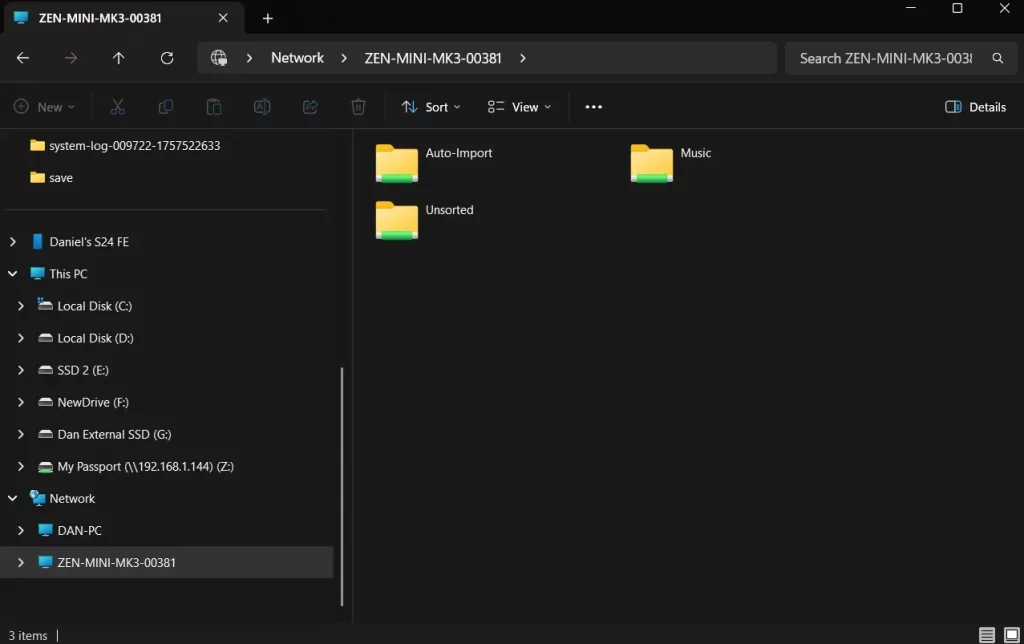
You can access the music files stored on your Innuos Music Server directly from your computer, as the server makes these available as Network Shared Folders, similar to a standard NAS device. At the root of the server, three Shared Folders are available:
- Auto-Import – A temporary holding folder where you can copy files or folders from your computer that you want to import into the Music Server. These files are not added to the library until you run the import process from the Sense app.
- Music – The main folder where your organised music library is stored. Any files placed here will appear directly in your Music Library.
- Unsorted – A general-purpose folder where you can place music that you have not yet organised, or even non-audio files. Music placed in this folder will still appear in the Music Library, even if not structured.
Windows PC
1. On your PC File Explorer and select Network.
2. Your Innuos server should appear here.
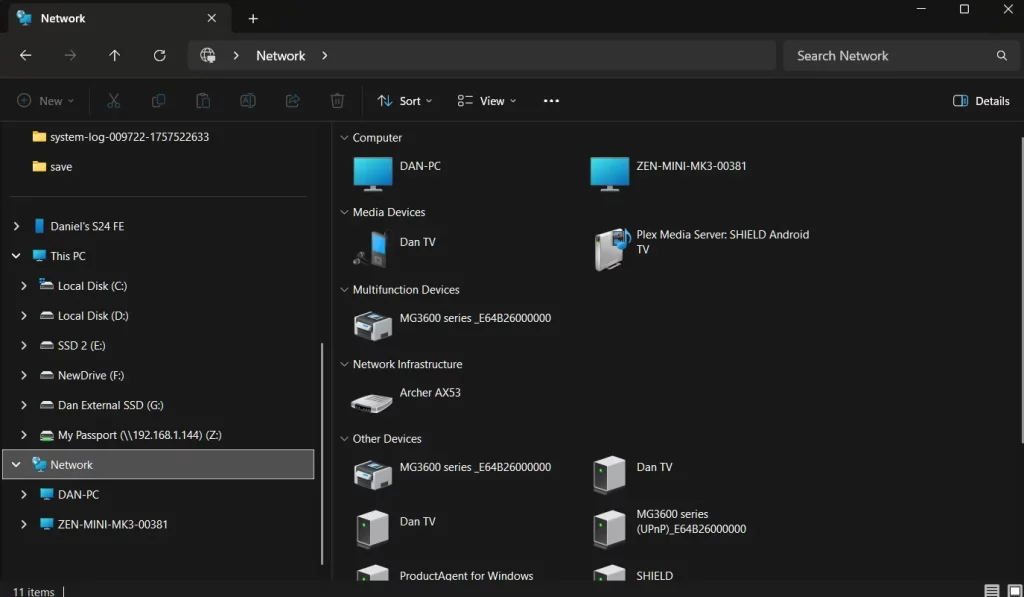
3. Please select your Innuos server. When prompted, enter the following login details (all in lowercase):
Username: guest
Password: innuos
4. You can now begin importing music to your Innuos server.
MacOS
The process is extremely similar to the process via Windows above.
1. Using Finder on MacOS select the drop-down menu: GO > select Network > select your Innuos server.

2. Please select your Innuos server. When prompted, enter the following login details (all in lowercase):
Username: guest
Password: innuos
3. You can now begin importing your Music to your Innuos server.

Importing Music with the Auto-Import Method
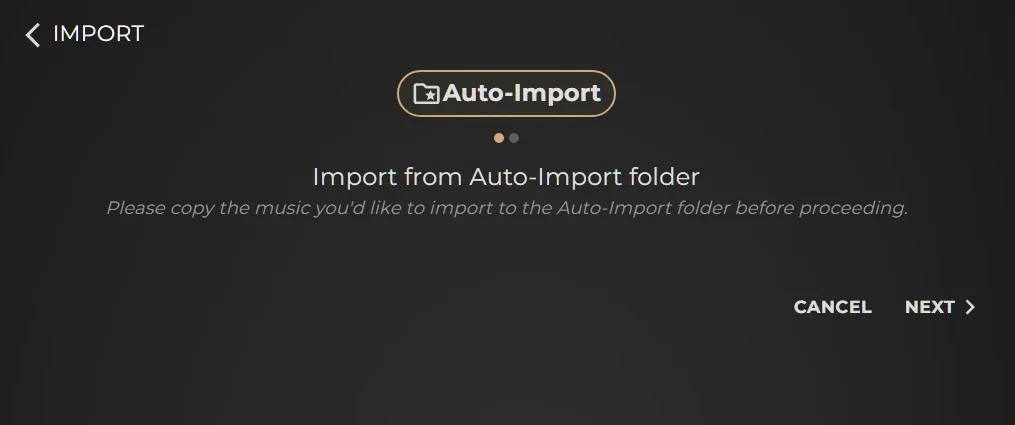
1. First, locate any music folders or files stored on your computer. Then open your server’s Auto-Import shared folder using the steps listed above. From there, simply copy and paste or drag the chosen music folders or files into the Auto-Import folder and wait for the transfer to finish.
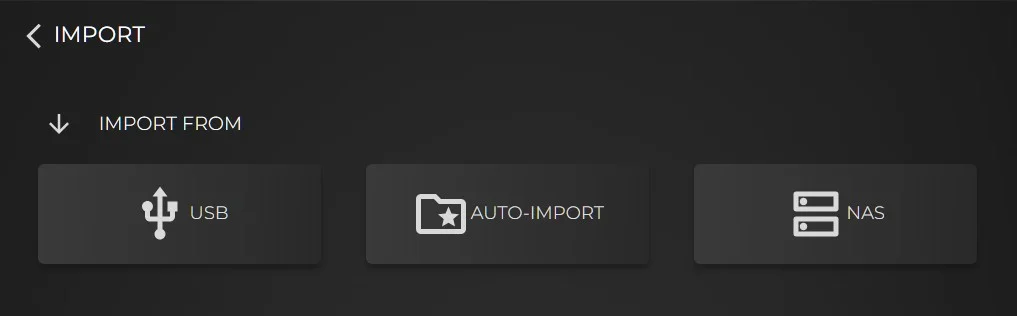
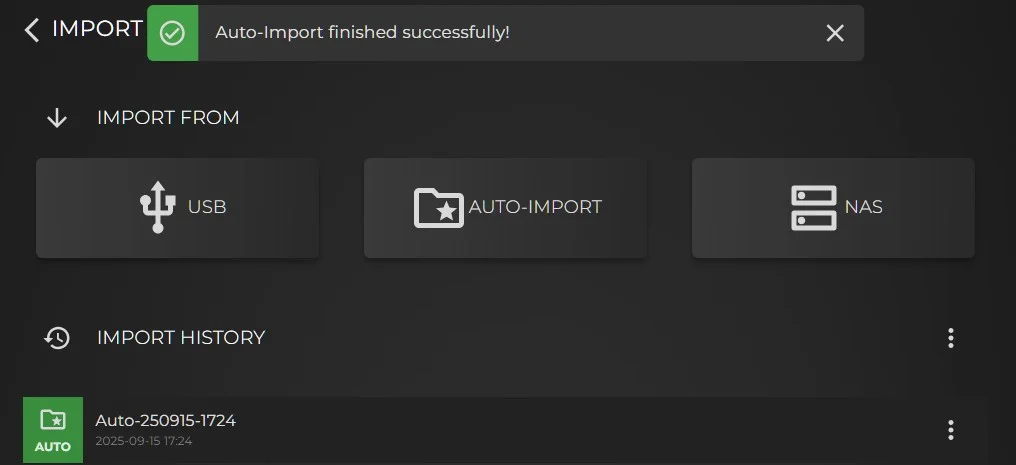
2. Once the transfer finishes, you can then open the Sense app or the Sense dashboard via my.innuos.com and go to System > IMPORT > AUTO-IMPORT. Select AUTO-IMPORT as the source to import from;
3. Providing you have completed the transfer of your desired music to import as described in Step 1 above then you may proceed and click the NEXT button;
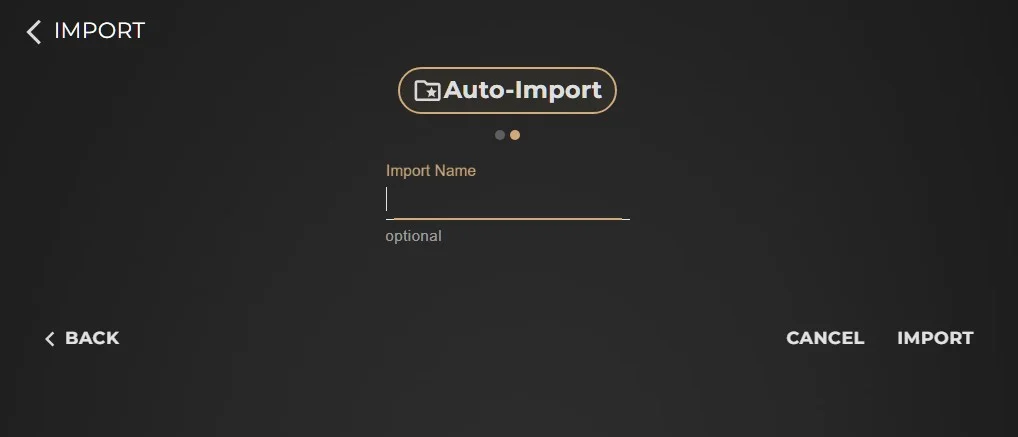
4. This step is optional. You can give your import a custom name, which will be used as the folder name where your files are copied. If left blank, a folder name will be assigned automatically. When ready, click the IMPORT button to continue.
5. All music folders and files copied to the Auto-Import folder will now be imported. Once complete, you will see a success notification on screen (as shown), and your Music Library will update automatically. You will also see a new entry in the Import History list below, which you can use later to remove that specific import if you wish to revert your Music Library to its previous state.
Importing Music by Copying Directly to the Music Folder
This method is straightforward: access the Music shared folder as described earlier in this article, create any folders you like, and copy your music from your computer into the target folder. As the music copies over, you can watch it appear in the New Music widget on the Sense Home screen. You can even browse and play the tracks as they’re being imported without waiting for the process to finish.